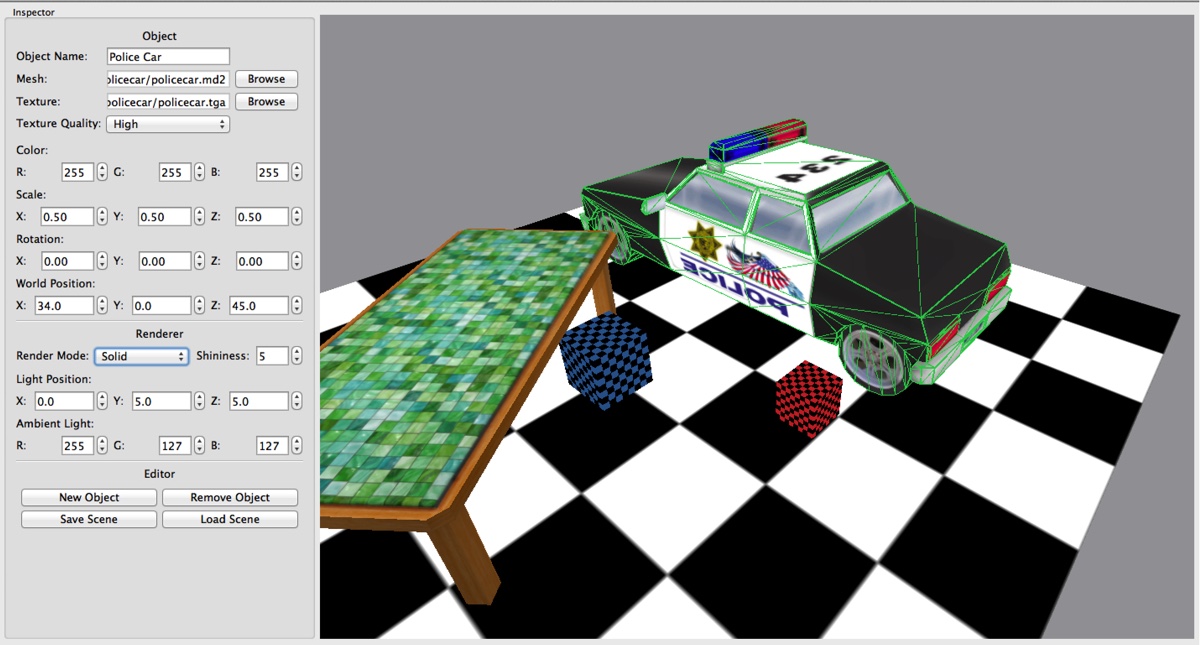
So I got assigned to create a simple 3D scene editor in a Graphics Programming unit of my University course… The specification gave a lot of freedom: Use C or C++ and OpenGL to create a “Unity3D/Unreal like” editor, having only the basic features of a scene editor of course, since I had a very short time frame to build it.

I decided to use this opportunity to get to know the popular Qt Framework. That’s what I’ve used for the GUI you can see on the left of the image above. The framework also provides a ton of other useful tools and components, such as image loading and XML file manipulation. Integration of Qt with OpenGL is pretty straightforward, but the learning curve of the library is accentuated. I’ve spent quite a few hours browsing the documentation to find out how to do stuff.
Also, building the GUI code by hand it confusing and mechanical. The best way is to use the provided tool, QtCreator, to graphically design the user interface and let the tool generate the C++ code for you. But despite that, Qt is an awesome framework that makes your life way easier when it comes to building user interfaces. It also helped make my project multi-platform; using the QtCreator tool you can easily compile it on Mac OS, Linux and Windows. I also made use of the Open Asset Import library (Assimp) which does a great job loading several 3D model formats. This helped me save a lot of time.
One interesting point to note is the object picking algorithm that I used. Since I didn’t want to utilize old OpenGL
legacy functionality I couldn’t rely on the old selection buffers/rendering. So what I did was to implement a workaround,
which does the job very well actually. I do a rendering pass assigning a different color to each object every time the user
clicks the scene area. Buffers for this rendering pass are never swapped, so the user doesn’t see anything. I then read the
pixel under the clicked region and compare the color of that pixel with all the colors of the objects in the scene.
If the pixel color matches the color of an object, the object is right under the cursor. Easy ;)
Anyway, enough talking. The projects is hosted here. Feel free to download and take a look!